Most of the case studies you'll read online are described, not shown. This one is shown. The two aerial photos below were taken from the same drone position over the same Mississauga backyard — one on July 27, before we started, and one on September 14, after the last roll of sod went down. Everything in between is what a properly built interlocking patio looks like when the base is done right.
Before & after, same angle
Before · July 27
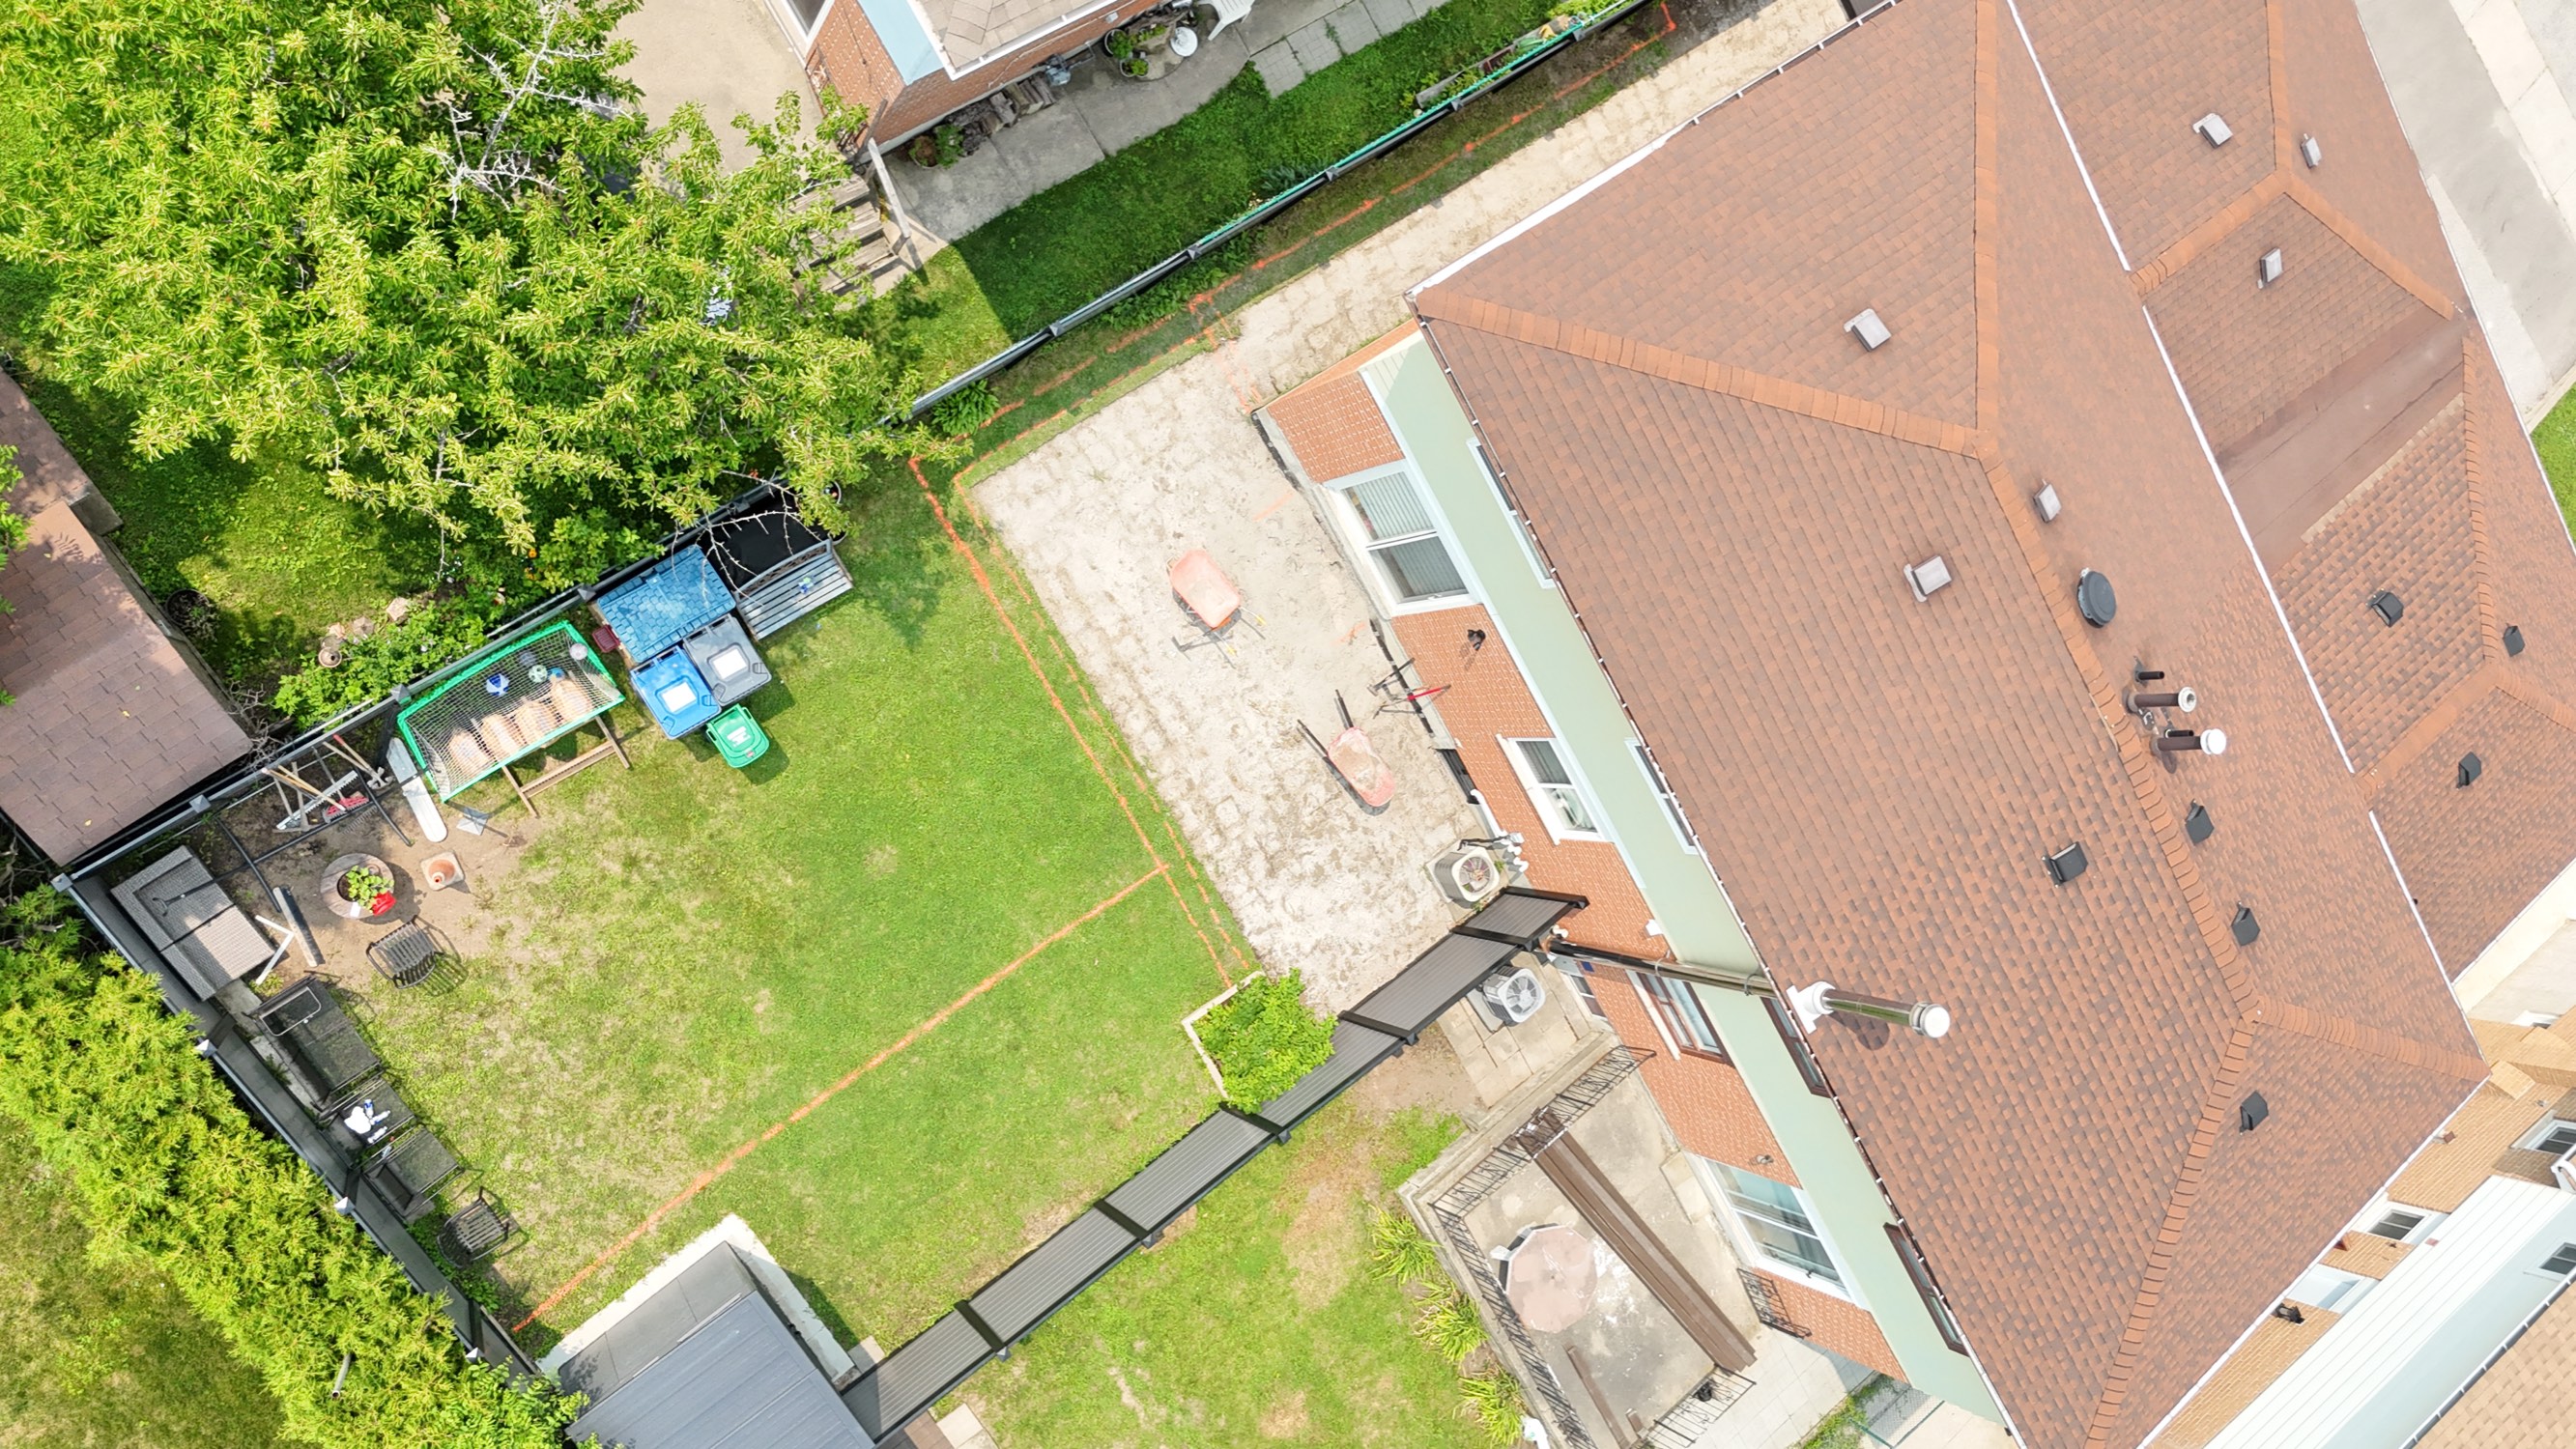
The original yard: a small, uneven slab patio at the door, a lawn worn to dirt along the fence line, and no defined place to sit or eat. The orange lines already sprayed on the grass are our layout marks for the new patio footprint.
After · September 14
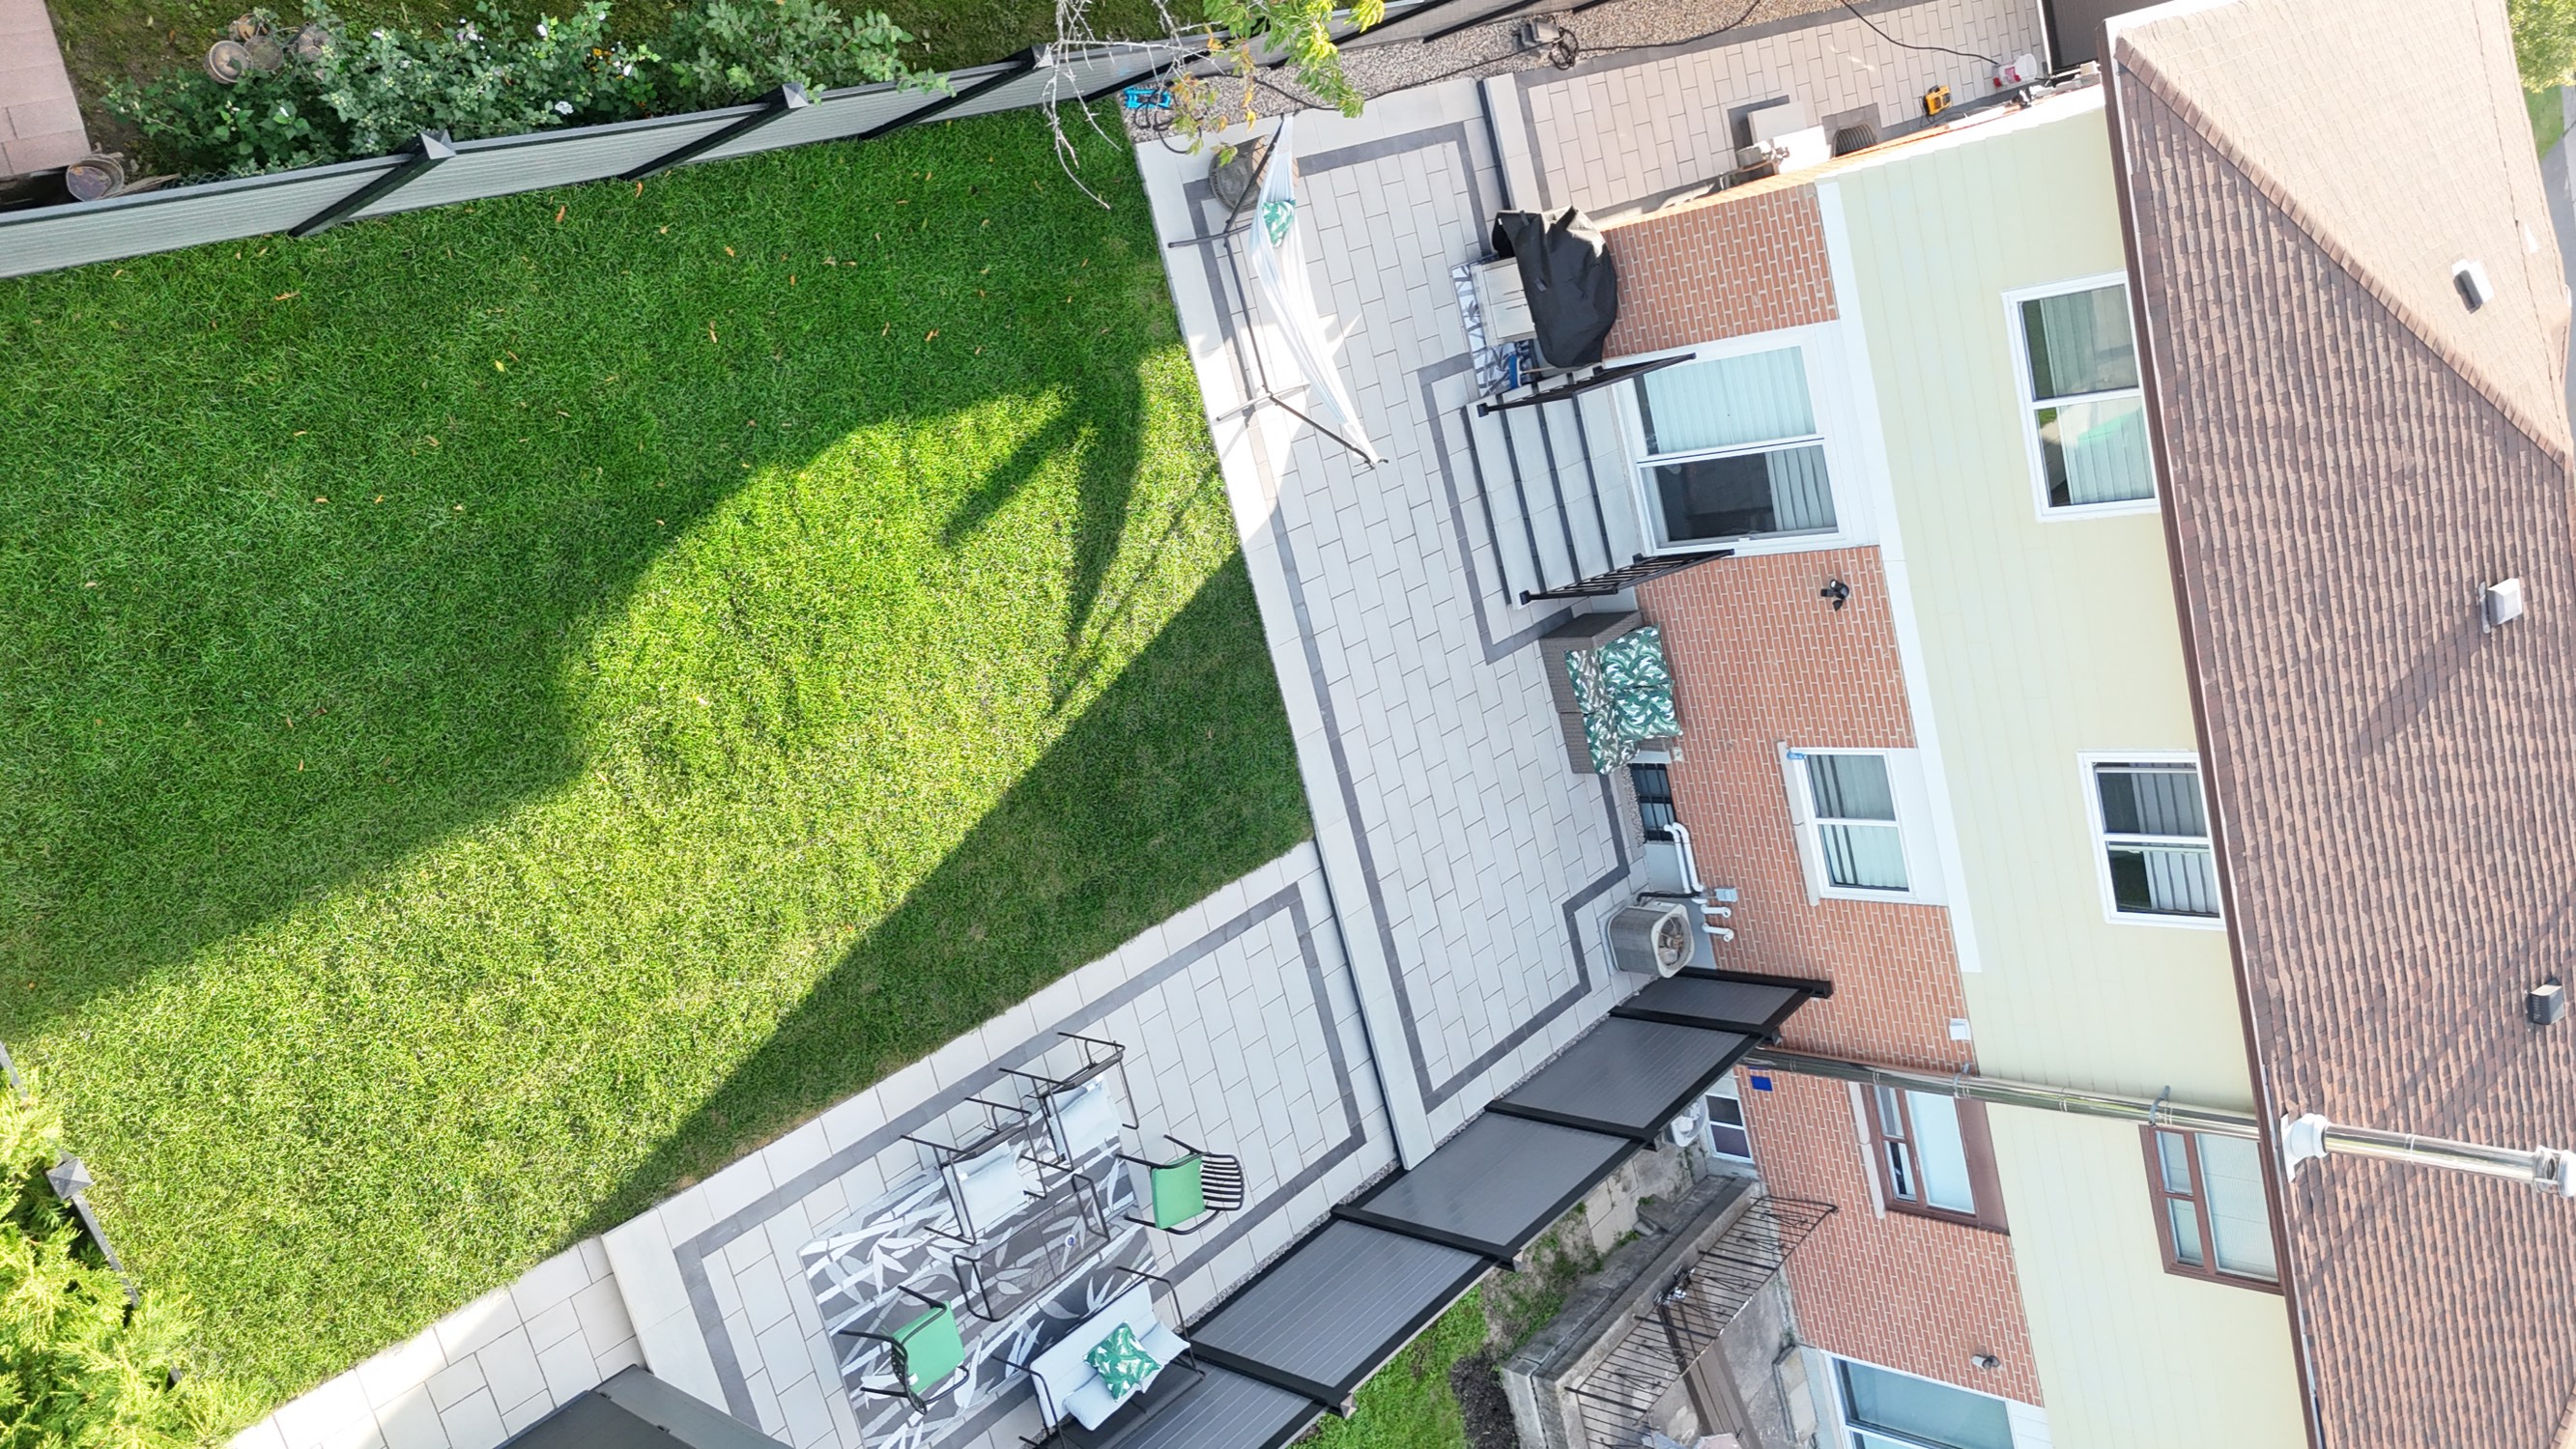
The rebuilt yard: a full-width interlocking patio at the door with a charcoal contrast border, a second bordered seating pad off the side yard, new stone entry steps, and a fresh sod lawn framed on all sides.
What we started with
This is a typical GTA semi-detached lot: fully fenced, a two-storey brick-and-siding home, a rear door that lands directly on the patio, and a side yard running down to a rear shed. The before photo shows the three problems the homeowners wanted solved:
- A patio that had stopped being a patio. The original slab was small, discoloured and uneven — it fit the base of the stairs and not much else. There was no room for a table, and nothing to make the space feel like an outdoor room.
- A lawn that was losing to foot traffic. The path from the door to the shed and the strip along the east fence had worn to bare soil. Every rain turned it to mud that walked straight back into the house.
- No second zone. Everything happened in one cramped spot by the door. The homeowners wanted somewhere to actually sit with guests — away from the BBQ and the back-door traffic.
The design decisions
The layout you can see in the after photo came from three choices we made on the first site visit:
- Run the main patio the full width of the house. Instead of a small square at the door, the patio spans wall to wall, so the stairs land on a real floor and the BBQ gets its own corner instead of blocking the walkway.
- Add a separate seating pad off the side yard. A second, bordered pad sits down the east side of the lot, connected by a paver walkway. It gives the homeowners a dining and lounge spot that is out of the door traffic and gets the afternoon sun. In the after photo, that's where the table, chairs and rug already live.
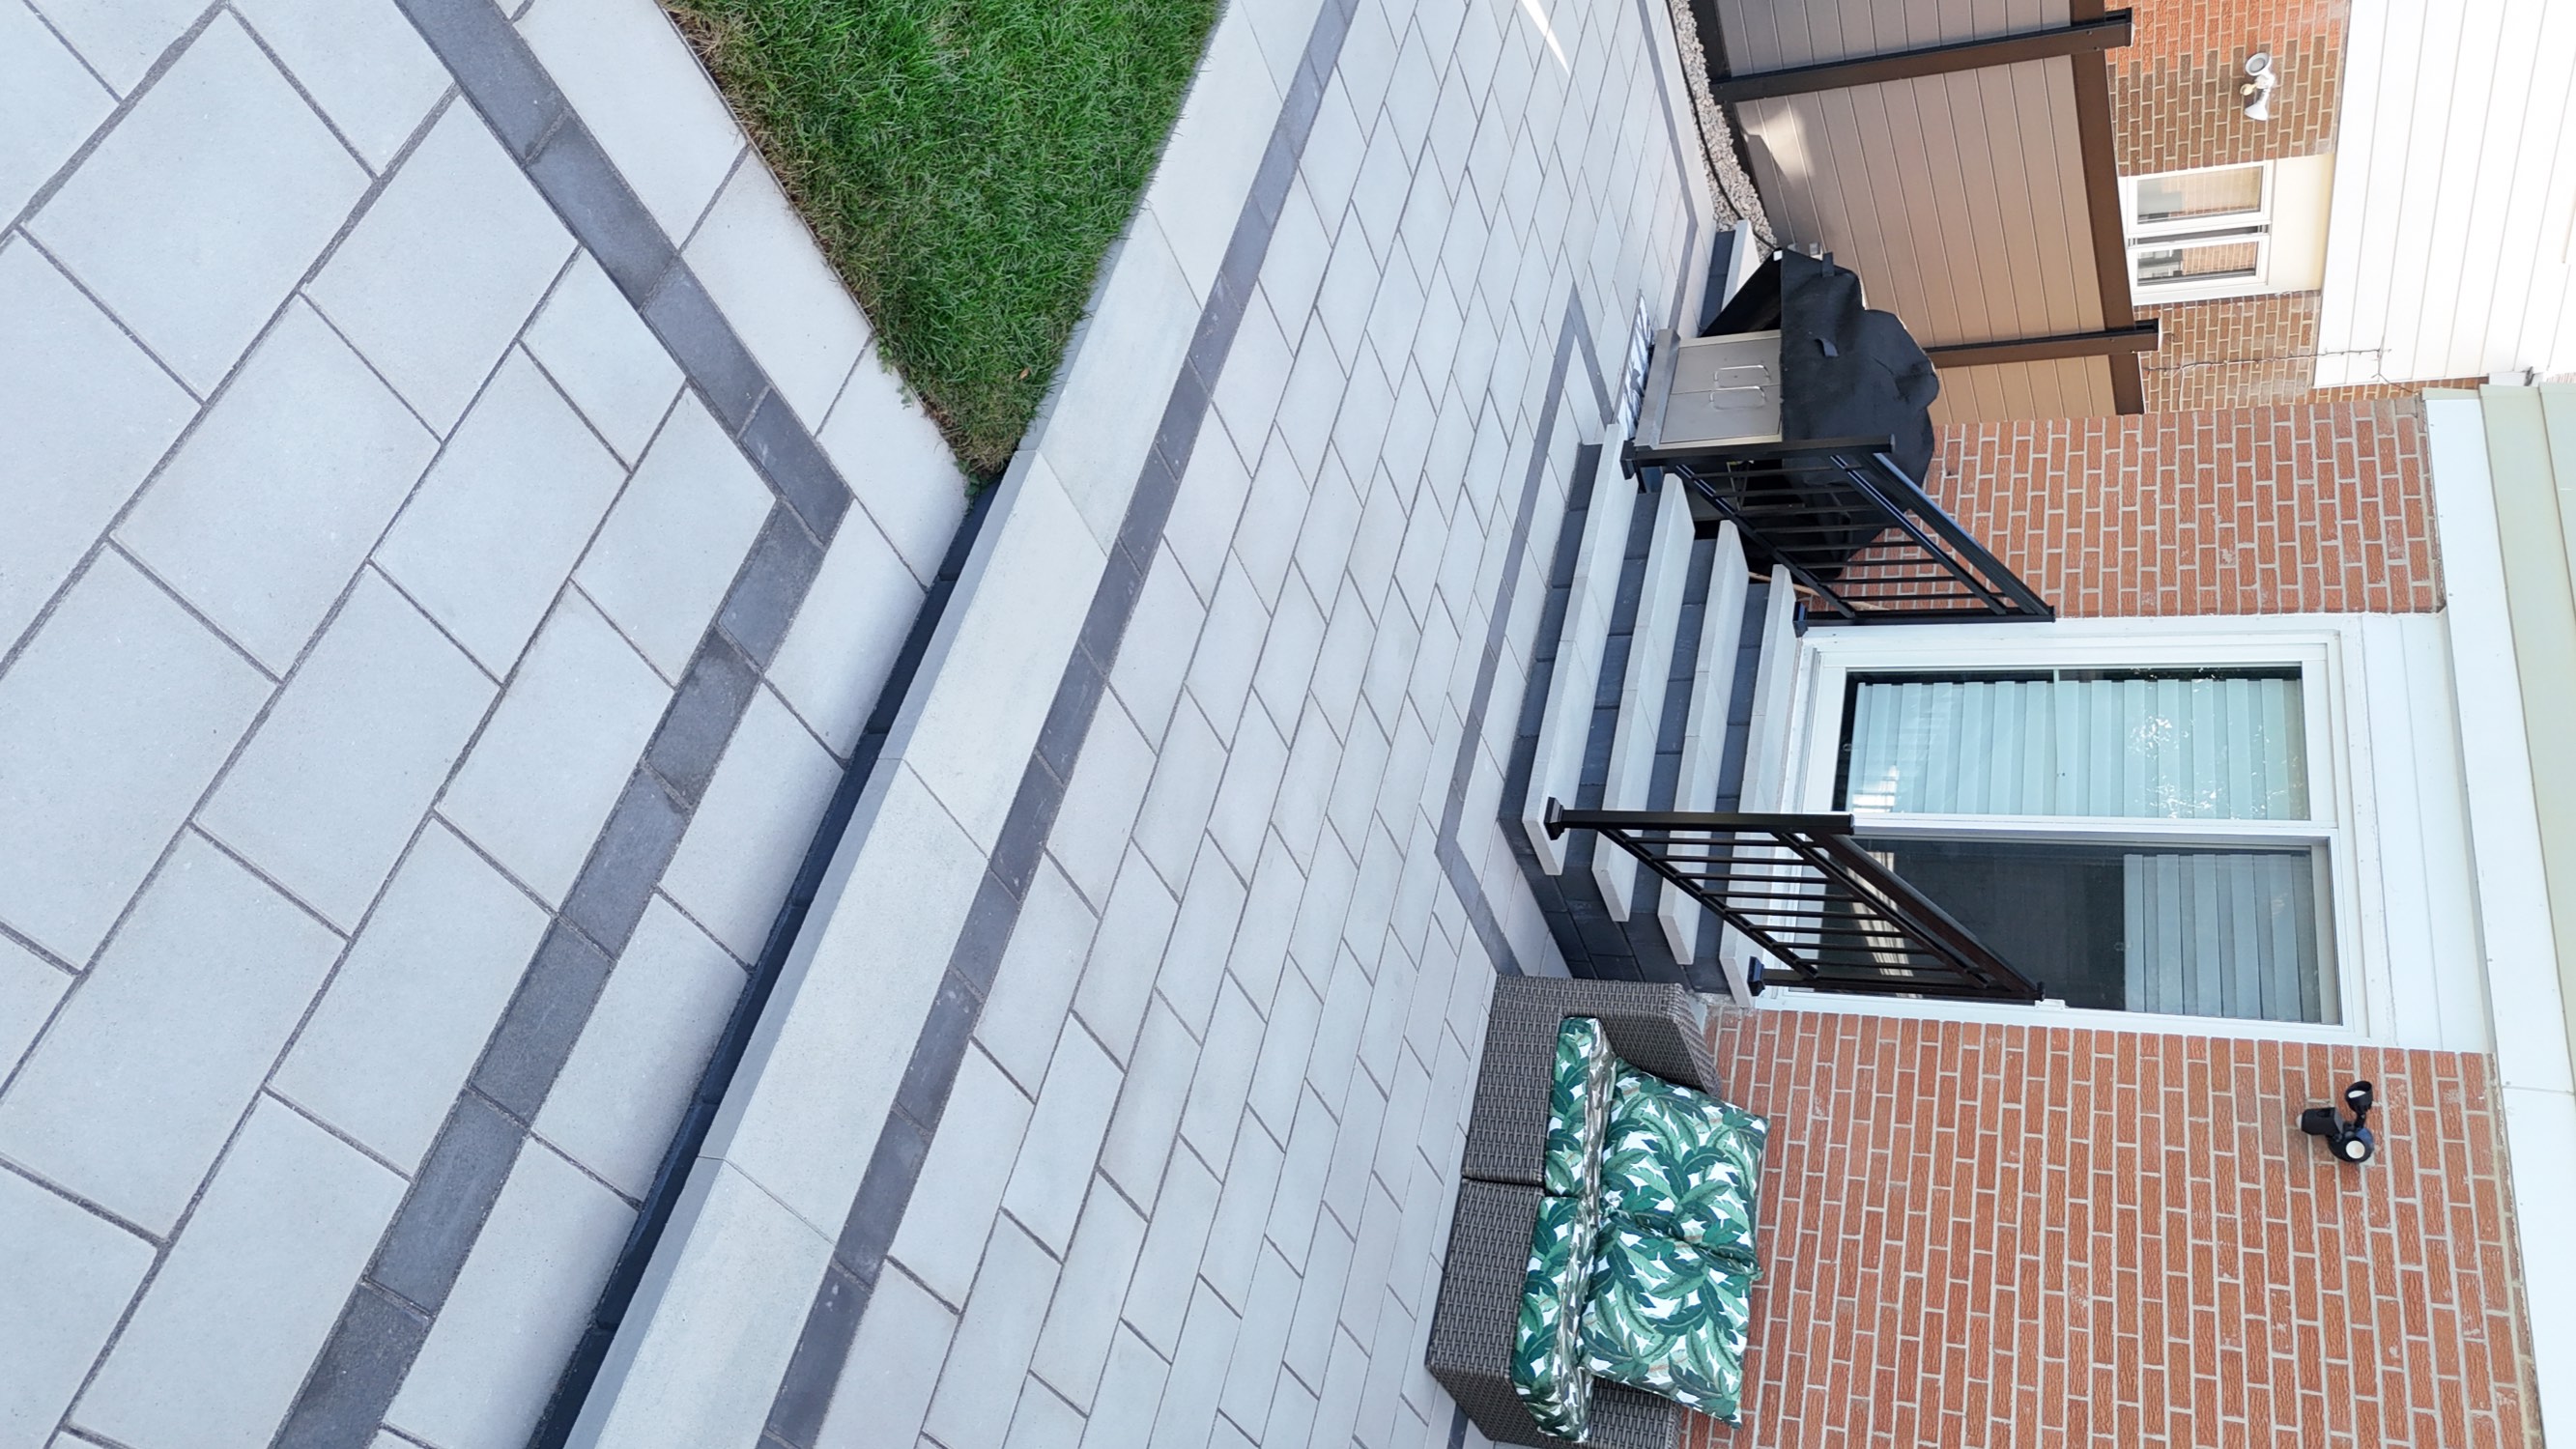
- Border everything in charcoal. Both pads and the connecting walkway are framed with a dark soldier-course border against a light grey field. The border does two jobs: it makes the edges read crisp from every angle, and it hides the edge restraint that keeps the pavers from migrating over time.
The lawn was deliberately kept — resized, re-graded and re-sodded rather than paved over. A backyard that is all hardscape reads as a courtyard; the homeowners wanted grass for the kids and the dog, just grass that survives.
How it was built
Seven weeks from the before photo to the after photo, in the order every interlocking job should follow:
Step 1
Layout and demolition
The patio footprint was sprayed on the ground before anything was touched — that's the orange line in the before photo. The old slab and the worn lawn inside the footprint were removed, and the excavation was taken down to stable ground for the full depth of the base.
Step 2
Base and grading
A compacted granular base was built up in lifts across the patio, walkway and seating-pad footprints, graded to shed water away from the house. This is the part of the job nobody sees in the after photo and the reason the pavers will still be flat in fifteen winters.
Step 3
Steps and edge restraint
The new entry steps were built on their own footing with a matching stone tread and a black railing, and edge restraint was set along every patio edge before a single field paver was laid.
Step 4
Pavers, border and joints
Light grey field pavers on a screeded bedding layer, charcoal soldier-course border around both pads and the walkway, then polymeric sand swept and set into every joint to lock the surface and keep weeds out.
Step 5
Grade the lawn and lay sod
With the hardscape finished, the remaining lawn area was re-graded to meet the new patio edges and sodded. In the after photo — taken about a week after the sod went down — it has already knitted in.
The finished result
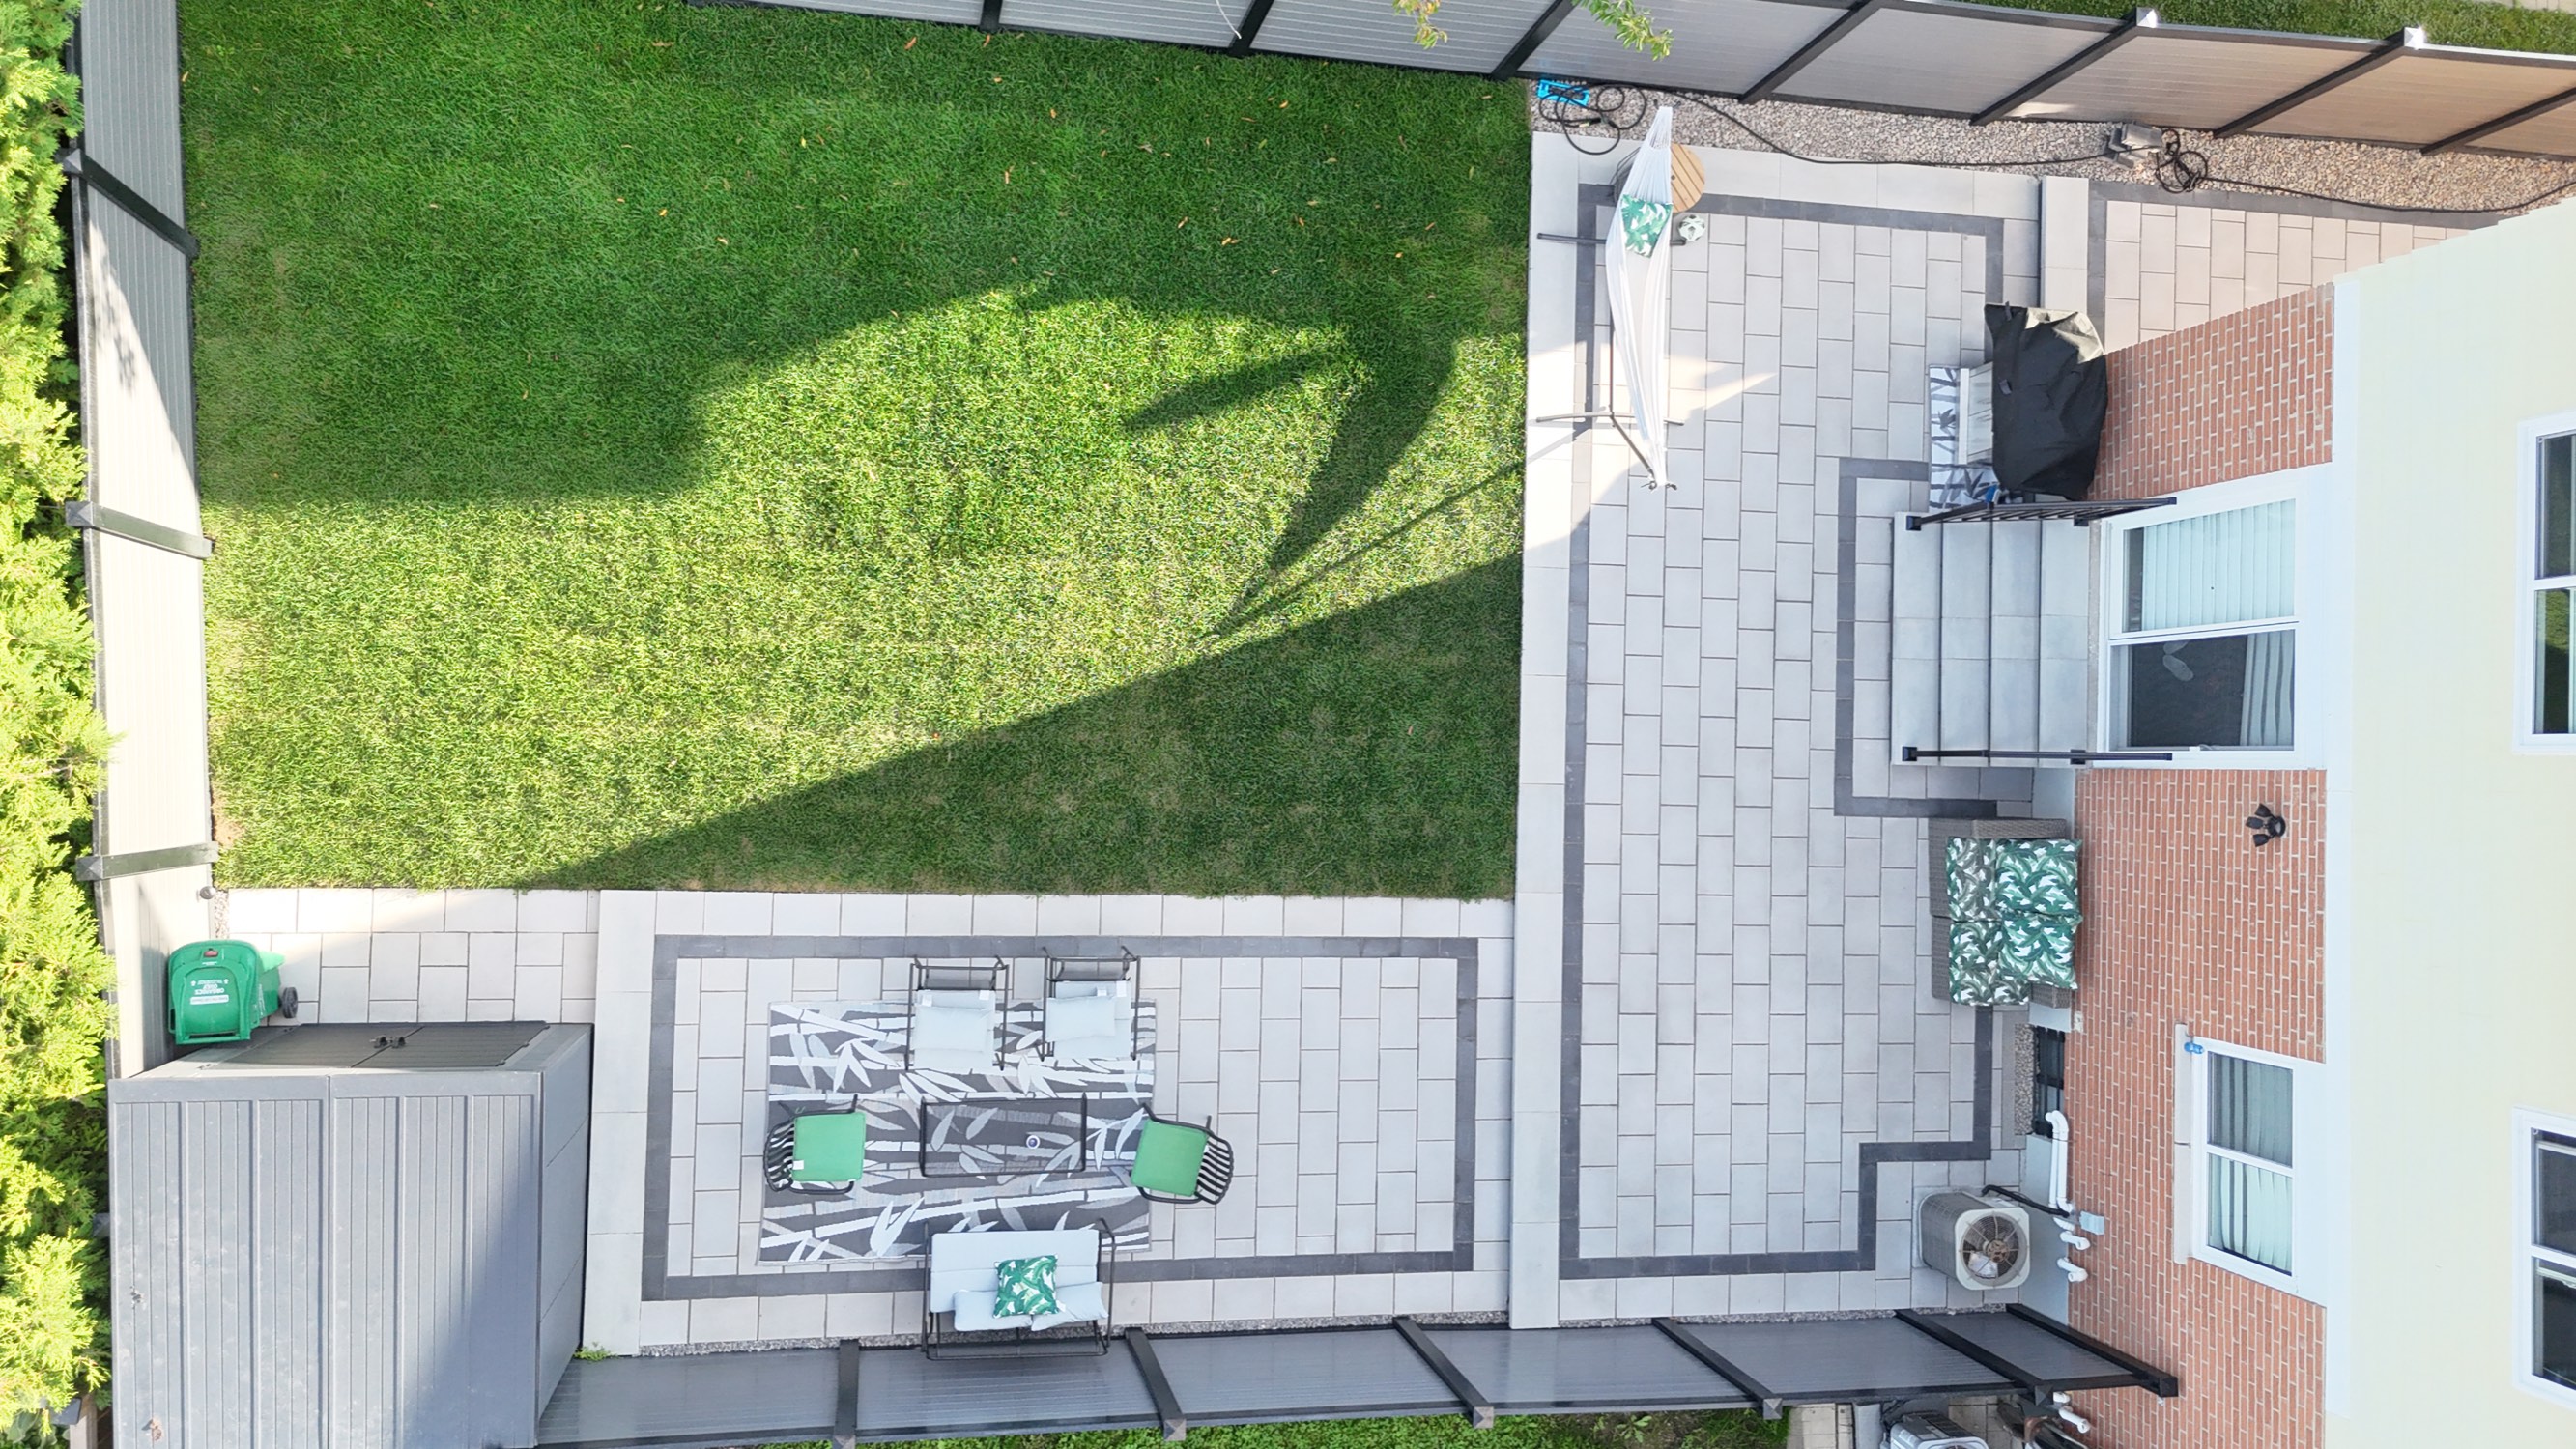
The after photos were taken before we'd even scheduled the follow-up visit — the homeowners had already moved their table, chairs and an outdoor rug onto the seating pad. That's the outcome we design for: a backyard that gets used the week it's finished.
- Two real outdoor rooms instead of one cramped landing. Dining and lounging on the seating pad; cooking and coming-and-going on the main patio.
- No more mud path. The high-traffic route from the door to the shed is now a paver walkway, so the lawn only has to be a lawn.
- Crisp edges that stay crisp. The charcoal border and the edge restraint under it mean the outline you see from above is the outline you'll see in a decade.
- A lawn that will actually survive. Smaller, properly graded, and no longer doubling as a walkway.
"Same drone, same spot, seven weeks apart. The photos do the talking — the base underneath is what makes them still true in fifteen years."
— Reliable Hardscapes, on the Mississauga rebuildTakeaways for your own backyard
- Lay it out before you dig. Spray the footprint on the grass and live with it for a few days. It's the cheapest design revision you'll ever make.
- Separate the zones. If your only patio is at the back door, everything competes for the same square footage. A second pad — even a small one — changes how the whole yard works.
- Pave the path, keep the lawn. Grass dies where people walk. Put pavers where the traffic is and the lawn you keep will stay green.
- Judge the contractor by the base, not the pavers. Any crew can lay a nice-looking surface. The compacted base, the drainage grade and the edge restraint are what you're paying for.
Thinking about a similar rebuild? See our interlocking patio service in Mississauga, current GTA patio pricing, or book a free on-site consultation.